
Vectorize Bitmap


Vectorize Bitmap

Sometimes, we may have a raster image (JPG, PNG ...), which used to be a vector image. The original vector image can be recreated by hand, but it may take a lot of time. Photopea can do it automatically, it is called bitmap vectorization or bitmap tracing.

After we open our raster image (or select the right layer in a layered image), press Image - Vectorize Bitmap. We will see a special Vectorizer window.

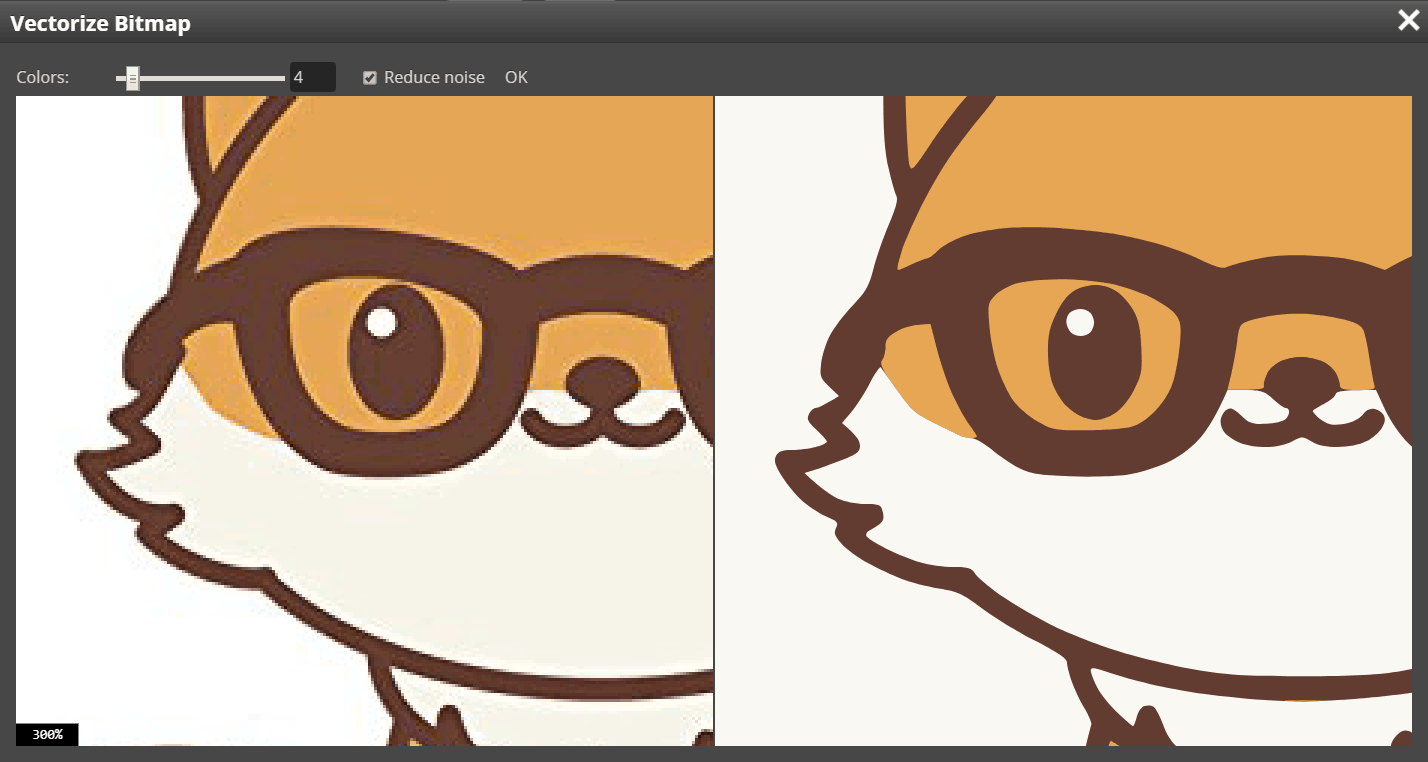
We can see the original image on the left and the vector image on the right. We can move both images with a mouse, or zoom in / out with a mouse wheel. We can also set two parameters:

  • Number of colors
  • Noise reduction
The need of the noise reduction is detected automatically for each image and we recommend not to change that setting. Once we are satisfied with the vector output, hit OK. Our original raster layer will be replaced with corresponding vector layers, ready for an additional vector editing, or for the export as vector graphics: SVG or PDF.


Comments

Popular posts from this blog

Introduction To Photopea

  Introduction Photopea is an advanced image editor, which can work with both raster and vector graphics. You can use it for simple tasks, such as resizing images, as well as complex tasks, such as designing webpages, creating illustrations, processing photographs and more. This website will teach you how to use Photopea  step by step . We will start with basic tasks and gradually progress to more complex features. The chapters (on the left) have been organized, such that each chapter uses only the knowledge from previous chapters, so you can learn effectively and efficiently. Colors Right now, Photopea works with the sRGB color space (the basic color space for the web), with the 8-bit color depth. All exported files use sRGB, too. Starting and using Photopea Photopea editor works in a web browser. It can be started by going to  www.Photopea.com . Photopea can run on any device (desktop, laptop, tablet, phone or any other computer), but for the best comfort, we recommend having a big s

Guides, Grid and Snapping

  Guides, Grid and Snapping Precise position of image elements can be very important. The basic tool, which can help us align image elements, are  rulers . Rulers can be enabled in View - Rulers. But there are several other ways how to align elements precisely. Guides There can be multiple guides in a PSD document. A guide is a horizontal or a vertical line, which is displayed over the document and can help you align elements. To add or delete a guide, select the Move tool and enable rulers. To add a guide, click on the ruler and drag the mouse into the document. To delete a guide, click on it and drag it onto the ruler. To move existing guides, click on them with a Move tool and drag them to a new location. Grid Designers often need to place some elements regularly, with an equal distance between them. Instead of adding many guides with the same spaces between them, we can use the  grid . A regular grid will be displayed over your document, which can help you align other elements. Pix

Text

  Text P utting text into images is an essential operation of image editing. Photopea offers a rich set of tools for working with text. Text is stored in PSD documents inside   Type Layers , which have a thumbnail with a capital letter T on it. There are three kinds of Type layers: Point text  - defined by the point of origin. The text starts at that point and continues on a single line until the line break (Enter). Paragraph text  - defined by the rectangle. Paragraphs are broken automatically into multiple lines to fill the rectangle. Text on a curve  - defined by a curve, letters are arranged along the curve. Creating a Type layer The  Type tool  is used for working with Type layers:  . To create a  Point text , choose a Type tool and click (press and release) the mouse at some place, which will become the origin. To create a  Paragraph text , press the mouse and drag it to draw a rectangle, then release the mouse. After creating the new Type layer, you can start typing. If you clic